1. Know Your Terminal
1.1 What is the Ecart Pay app?
Ecart Pay is the application installed on the payment terminal that allows you to charge, check transactions, refund, set tips, and offer installment payments.
📌 The terminals only have this app installed to avoid confusion. |
|---|
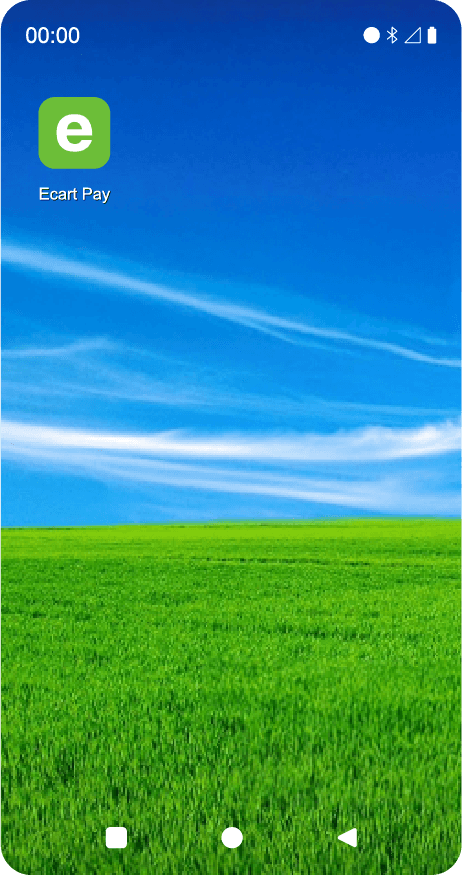
1.2 App Icon
Identify the Ecart Pay icon on the main screen of the terminal.
By tapping it, you will access the app's home.
2. First Use: Log In and Link the Terminal
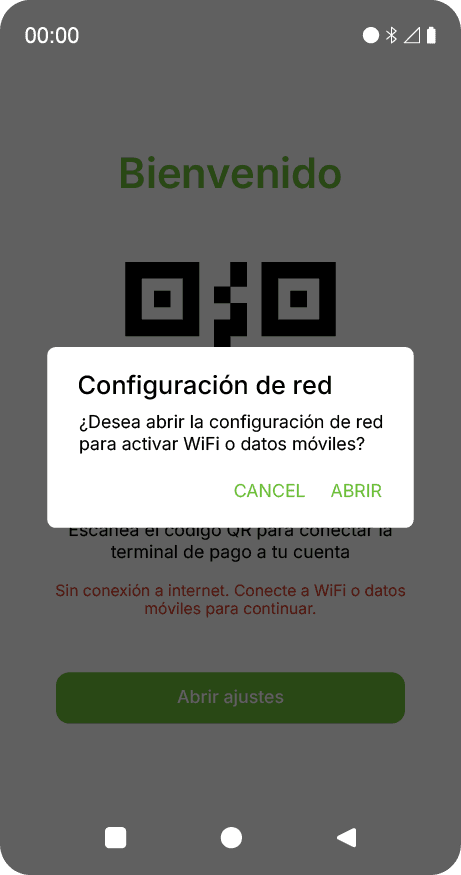
2.1 QR Code Screen
When using the terminal for the first time, you will see a screen with a QR code.
What is this QR for?
Link the terminal to your Ecart Pay account.
It is only used the first time or if you log out.
Steps:
Scan the QR with your phone.
Log in to your Ecart Pay account from your mobile.
The terminal links automatically.
✔️ From this moment on, the terminal will log in automatically every time you open the app. |
|---|

2.2 Internet Connection Issues
If the terminal does not have a connection (WiFi or data):
You will see a message indicating that there is no internet.
A button will appear to activate the connection.
📶 The terminals include an AT&T chip with data, designed exclusively for their operation. |
|---|
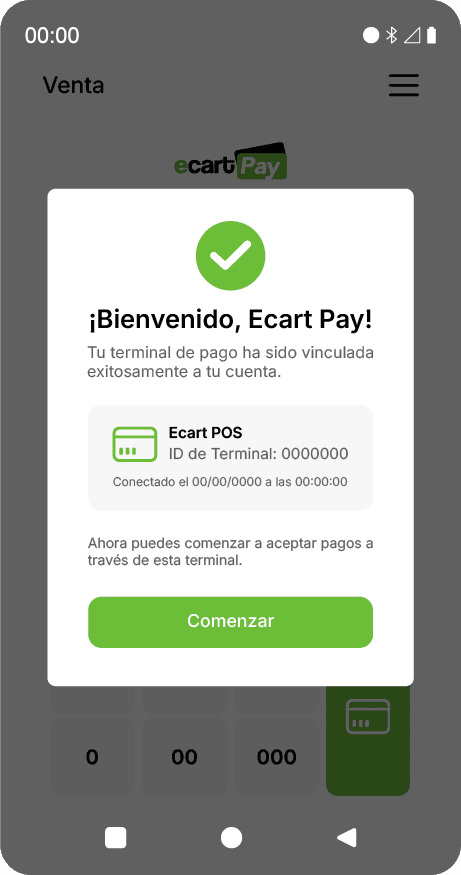
2.3 Welcome Screen
When linking the terminal for the first time, a welcome message will appear with:
User name
Serial number of the terminal
Model
Linking date
This screen:
Closes automatically after 30 seconds, or
You can press “Start”
3. Charge a Sale
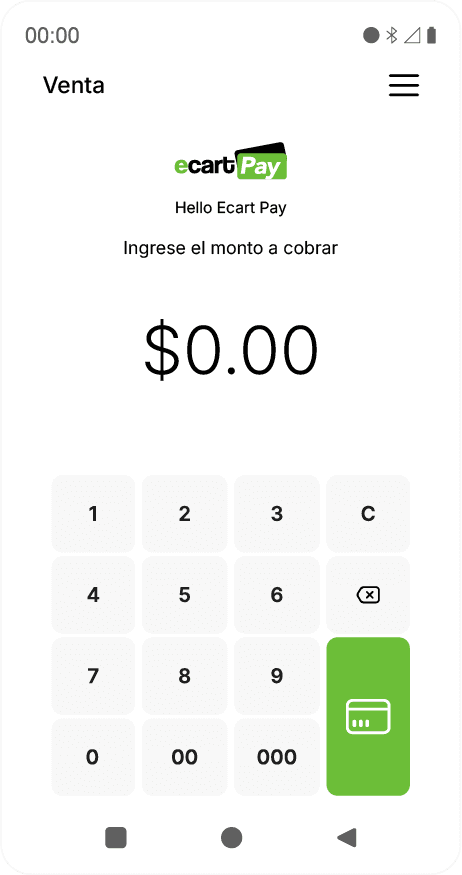
3.1 Main Charging Screen
This is the screen you will use every day to charge.
By default, all transactions are of type SALE.
Enter the amount to charge.
Press the green button with the card icon.
3.2 Tip Selection
⚠️ Important Note
The tip screen may or may not display, depending on the settings that the merchant has activated. This setting is explained later in the Set Tip section. |
|---|
If the tip is enabled, before paying, the terminal will show the tip selection screen.
Available options:
3 buttons with predefined percentages
1 button for no tip
1 button to enter a custom tip (amount or percentage)
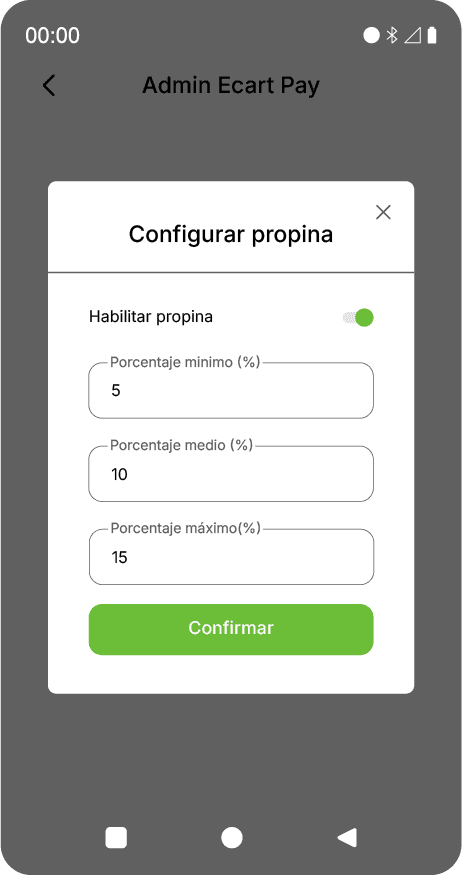
⚙️ These percentages can be customized later. |
|---|
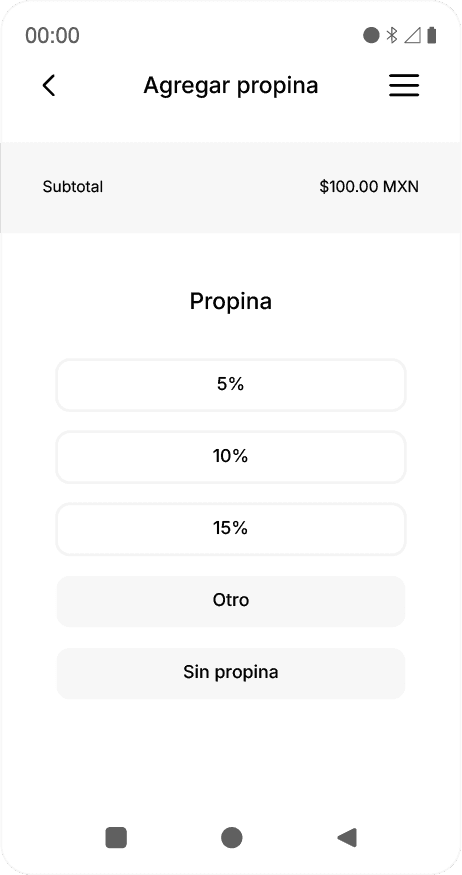
3.3 Custom Tip
If you choose a custom tip:
You can enter:
A fixed amount, or
A percentage of the total
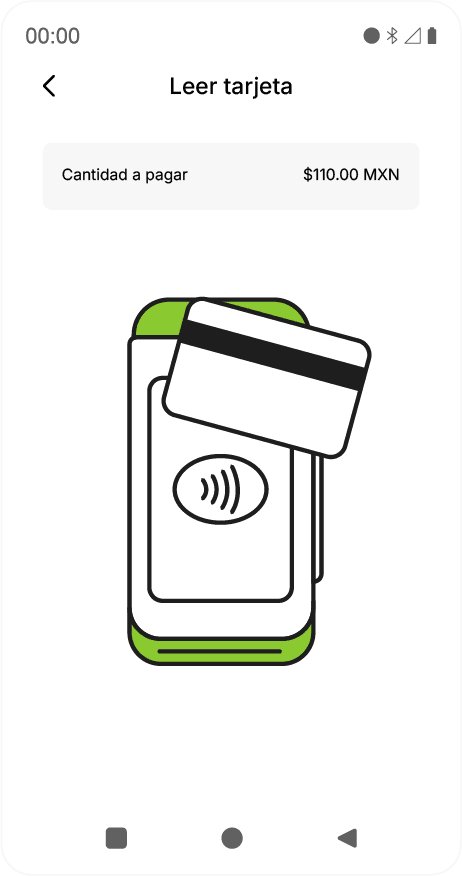
3.4 Payment by Card
After confirming the tip:
The customer must:
Insert Card:
Payment via chip, inserting the card into the terminal during the transaction.
Tap Card
Payment using contactless technology, either with: Physical contactless card, or digital wallets (for example, payments from a mobile phone or smartwatch).
The terminal will process the payment and display the result:
✅ Successful payment
❌ Error message with the reason for rejection
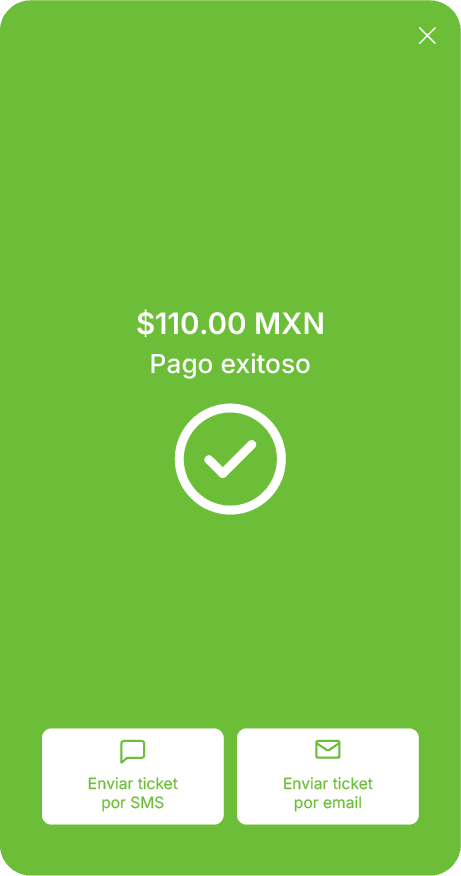
3.5 Successful Payment
When the payment completes successfully, you will see the confirmation screen.
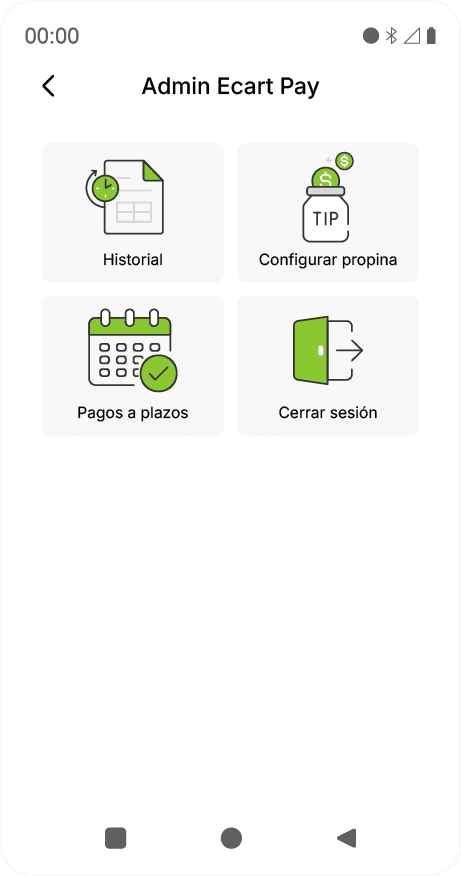
4. Main Menu
In the upper right corner, you will find the menu (☰).
From here, you can access:
Transaction history
Set tip
Installment payments
Log out
5. Transaction History
5.1 View Transactions
By default, it shows transactions from the last 30 days.

You can change the range using the date filter.
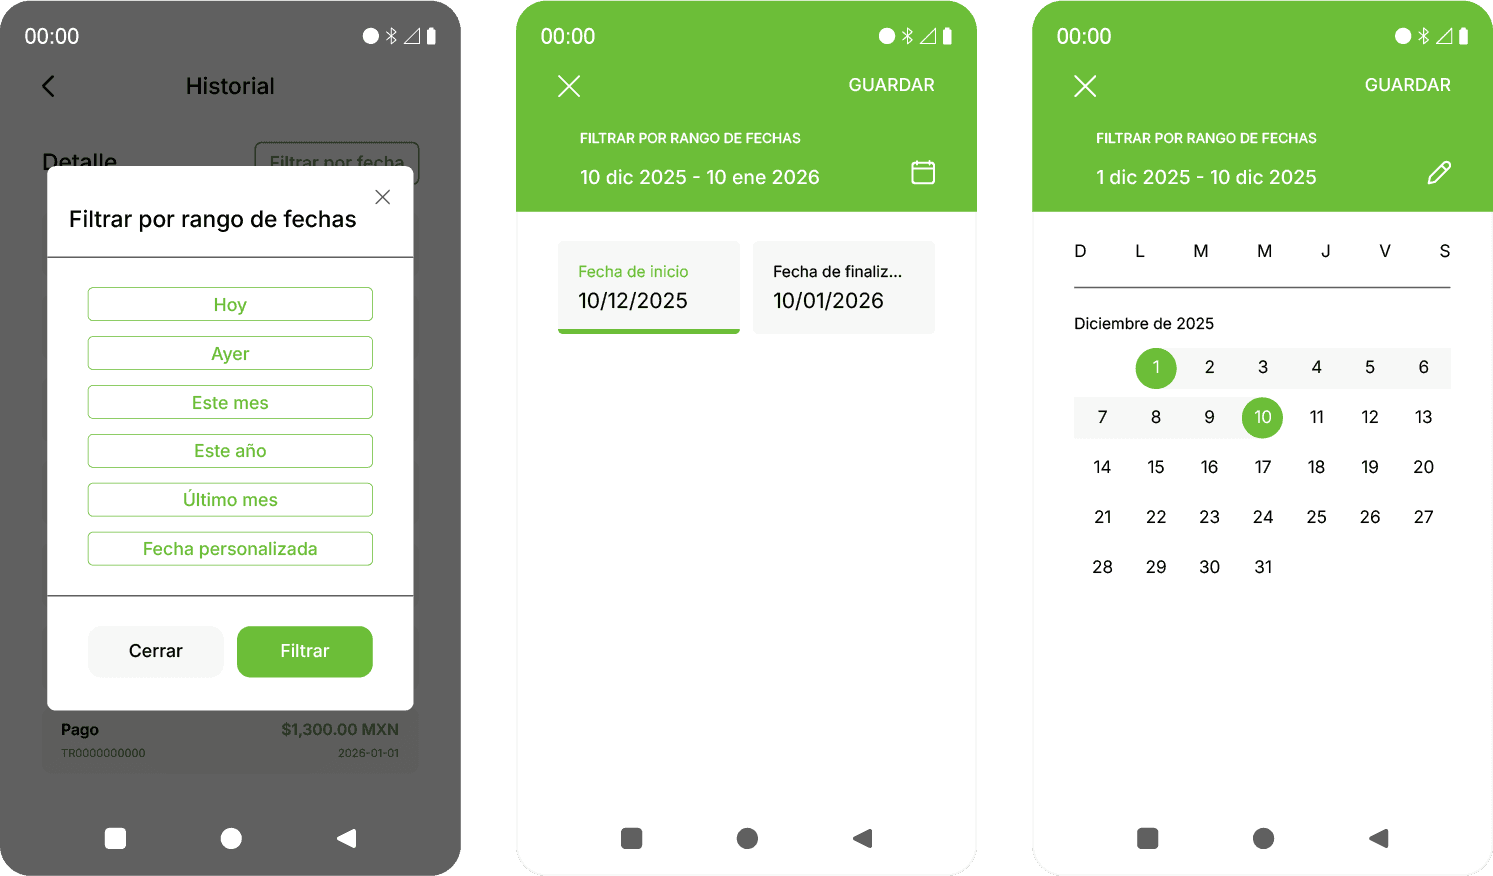
5.2 Transaction Details
Each transaction is an expandable card.
When you open it, you will see:
Payment details
Available buttons:
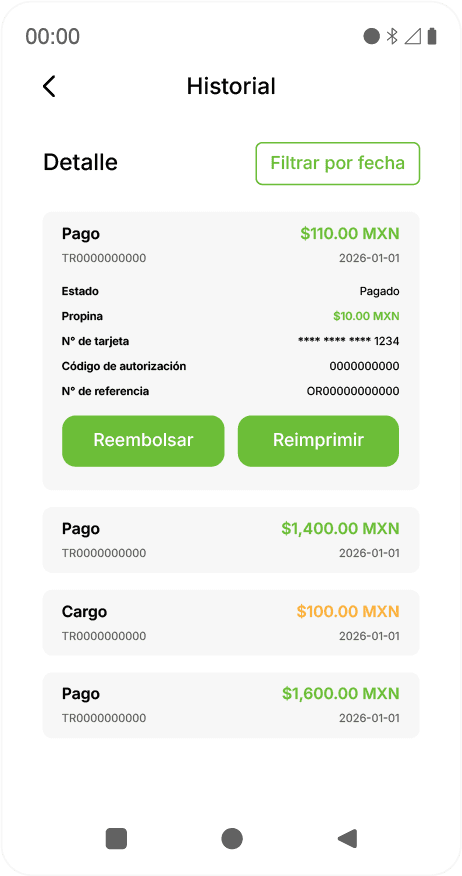
⚠️ If the transaction has already been refunded or has another status, these buttons will be disabled. |
|---|
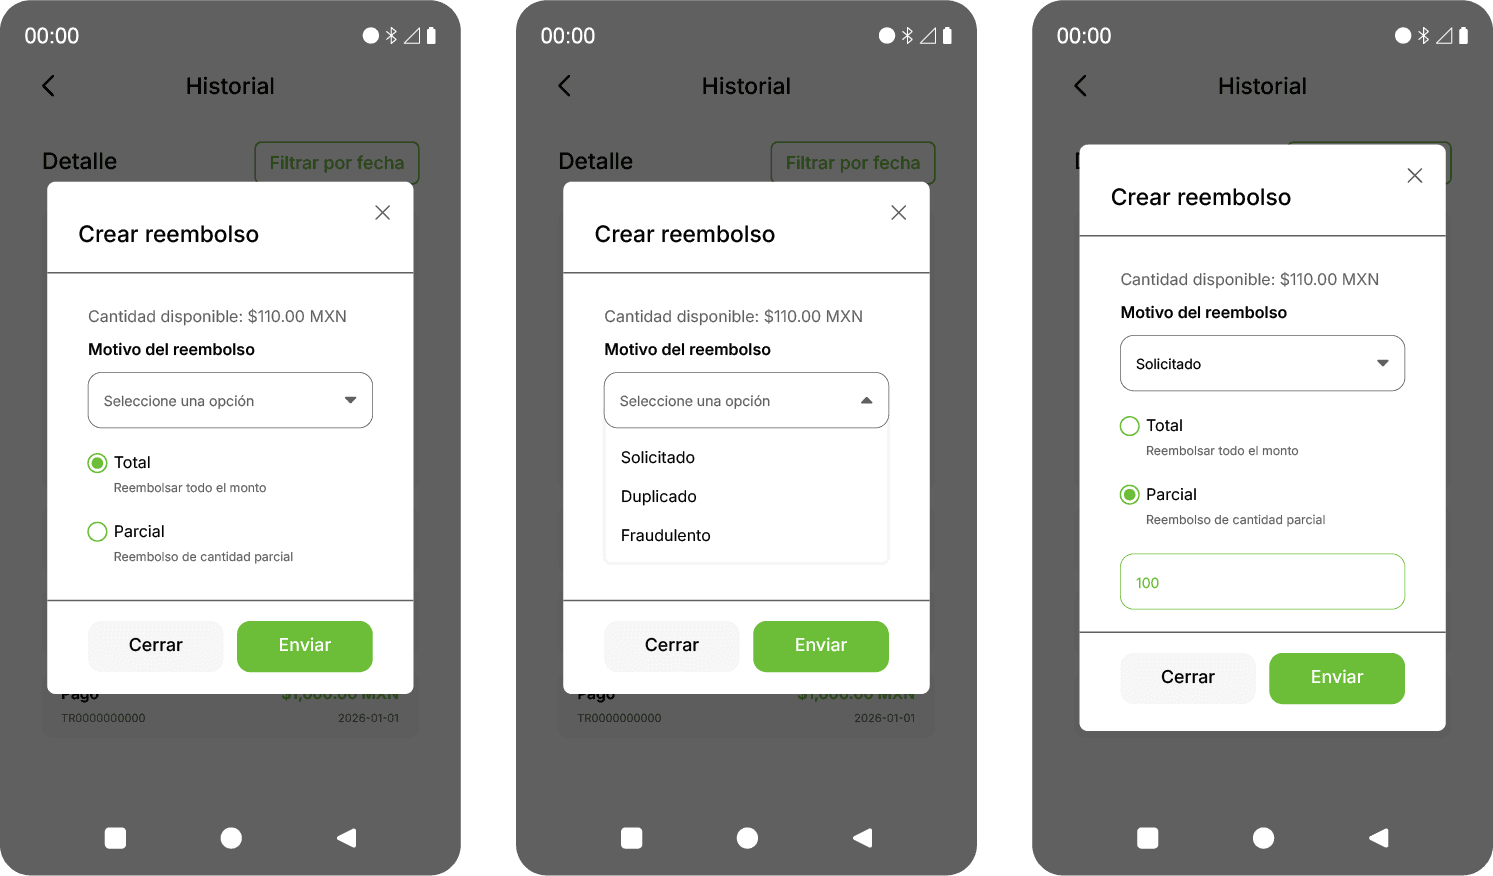
5.3 Refunds
Steps to refund:
Press Refund.
Choose:
Requested
The customer requested the return of the payment (due to cancellation, product return, or dissatisfaction).
Duplicate
The payment was made twice by mistake, either by the customer or during the collection process.
Fraudulent
The payment was not recognized by the customer or it is suspected that the transaction was made without their authorization.
Choose:
Total refund, or
Partial refund.
Partial Refund
Enter an amount less than or equal to the original total.
If you enter $0 or an amount greater, the refund will not be processed.
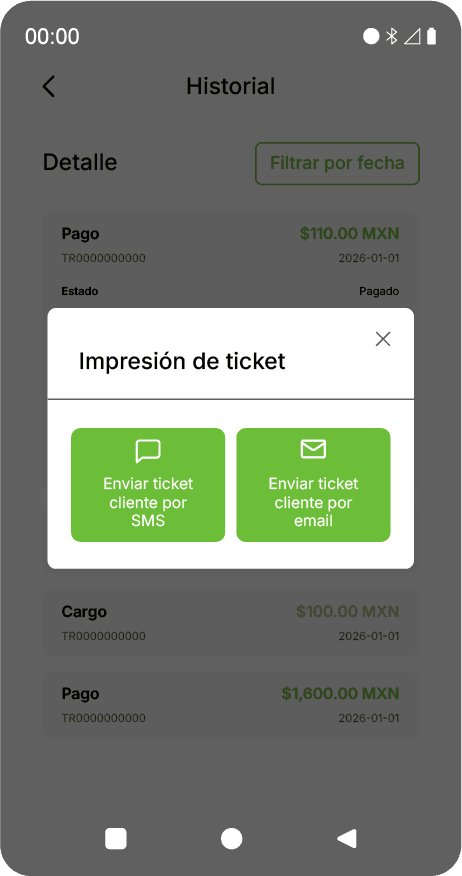
5.4 Reprinting Receipts
Depending on your terminal model, you will see different options:
Without printer:
Send receipt via SMS
Send receipt via email
With integrated printer:
Print customer receipt
Print merchant receipt
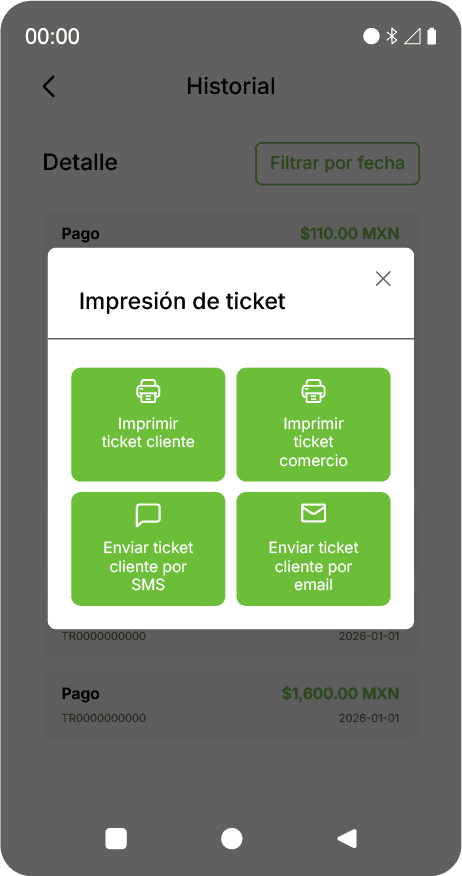
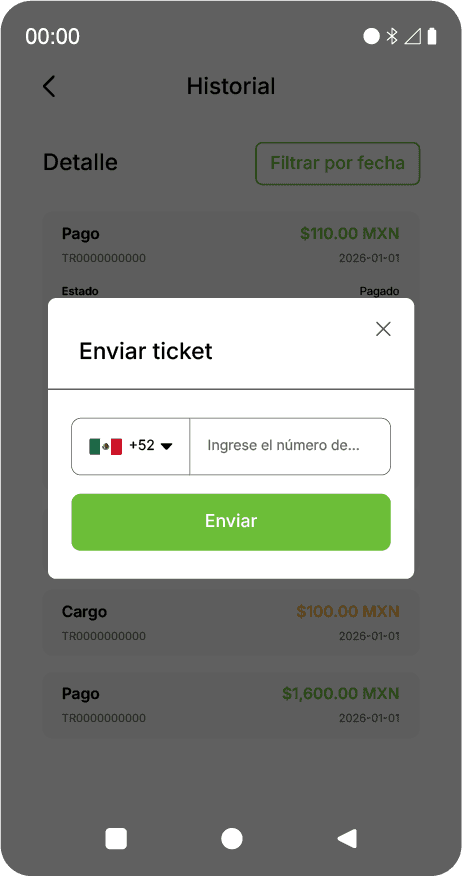
Send receipt via SMS
Enter the phone number.
The customer will receive a link to view their receipt online.
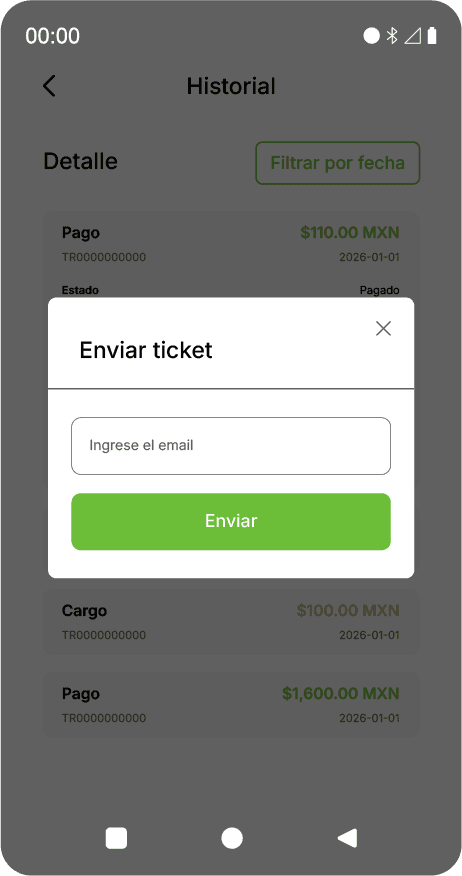
Send receipt via email
Enter the email address.
The receipt will arrive directly in their inbox.
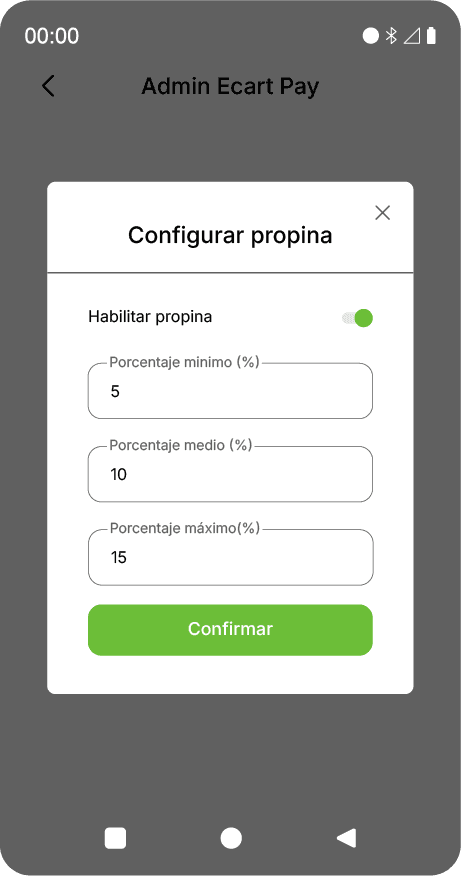
6. Set Tip
From this section, you can:
Define 3 main tip percentages.
Activate or deactivate tips completely.
To save changes:
7. Installment Payments (Months with No Interest)
This section allows you to configure installment payments by brand:
Visa
Mastercard
American Express (AMEX)
Learn more about Installment Payments (Months with No Interest)

⚠️ All 3 fields are mandatory. |
|---|
7.1 Visa and Mastercard
Select the available months.
Define a minimum amount for each installment.
Indicate if it is:
Months with no interest, or
Deferred payment.
If an option is disabled, it cannot be edited.
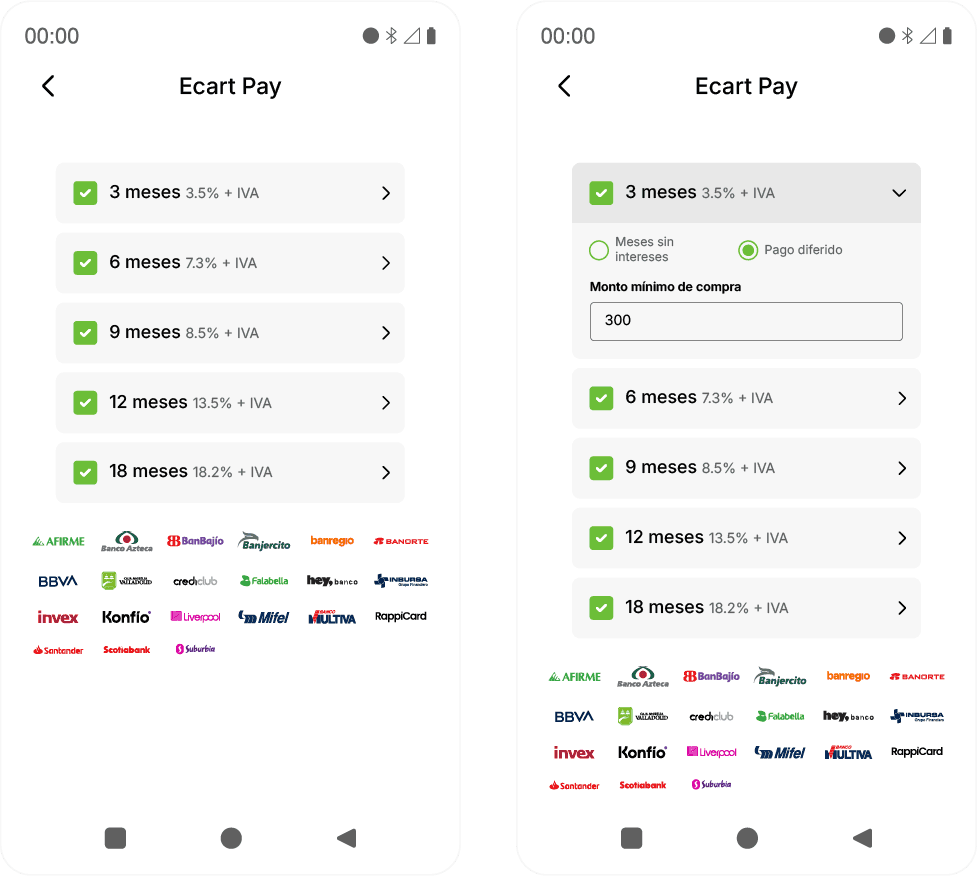
7.2 American Express (AMEX)
The configuration is global.
No minimum amount or individual installments are defined.

🔄 This configuration can be managed from the web platform and applies to all your terminals. |
|---|
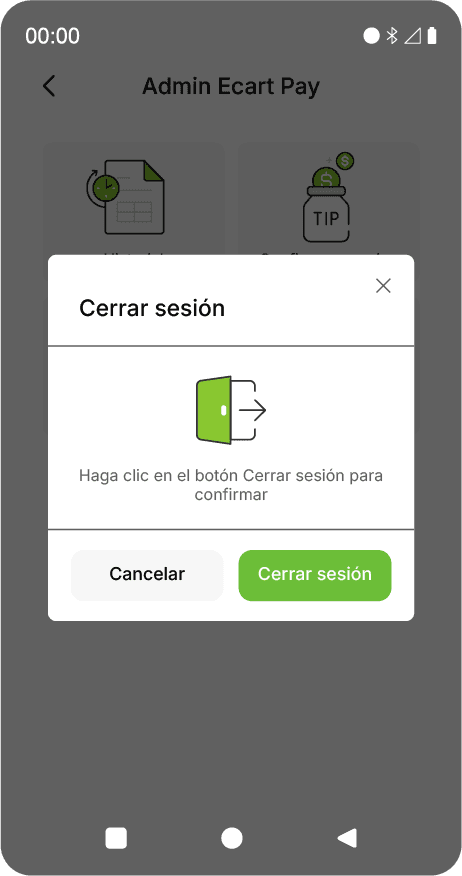
8. Log Out
Use this option to log out of your account on the terminal.
🔐 Recommended only in case of a change of responsible person or return of the terminal. |
|---|
9. Web Platform (optional)
From the web platform, you can:
View active terminals
Edit them
Rename them
Configure global installment payments
10. Support
If you have questions, issues, or suggestions:
📩 Email: support@ecartpay.com
📞 WhatsApp / Phone: (+52) 81 2352 8962 |
|---|


